Repeat a Wifi Hotspot: Difference between revisions
| Line 16: | Line 16: | ||
[[File:R_wifi_01.png | 400px | top]] | [[File:R_wifi_01.png | 400px | top]] | ||
From the menu go to '''Network''' | '''Wifi'''. | From the menu go to '''Network''' | '''Wifi'''. | ||
Then Hit The '''Scan''' button to find your hotspot network. | |||
[[File:R_wifi_02.png | 400px | top]] | [[File:R_wifi_02.png | 400px | top]] | ||
Select your network with the '''Join Network''' button. | |||
[[File:R_wifi_03.png | 400px | top]] | [[File:R_wifi_03.png | 400px | top]] | ||
Leave everything as default then hit '''Submit''' | |||
[[File:R_wifi_04.png | 400px | top]] | [[File:R_wifi_04.png | 400px | top]] | ||
Hit '''Save & Apply''' on the next page. | |||
[[File:R_wifi_01.png | 400px | top]] | [[File:R_wifi_01.png | 400px | top]] | ||
Return to '''Network''' | '''Wifi'''. Then hit the '''Add''' button to add the Access point interface. | |||
[[File:R_wifi_05.png | 400px | top]] | [[File:R_wifi_05.png | 400px | top]] | ||
On this page enter the Essid that you would like to use (Using OpenWRT in this example). Make sure that '''LAN''' is ticked in the Network section. Then save it with '''Save & Apply'''. | |||
[[File:R_wifi_06.png | 400px | top]] | [[File:R_wifi_06.png | 400px | top]] | ||
Now navigate to '''Network''' | '''DHCP & DNS'''. Untick '''Rebind protection''' then do '''Save & Apply'''. | |||
[[File:R_wifi_07.png | 400px | top]] | [[File:R_wifi_07.png | 400px | top]] | ||
Connect a wifi device to the network you just created. '''OpenWRT''' in our case here. Connect to any website then the hotspot login page will appear. Enter your credentials and any device connecting to the [http://www.ebay.co.uk/itm/141656483595 WR703N] wifi will be connected. | Connect a wifi device to the network you just created. '''OpenWRT''' in our case here. Connect to any website then the hotspot login page will appear. Enter your credentials and any device connecting to the [http://www.ebay.co.uk/itm/141656483595 WR703N] wifi will be connected. | ||
Revision as of 16:42, 8 May 2015
In this setup we will show how we can connect to a wifi hotspot and redistribute the signal so that several computers/phone can connect.
Hardware
Software
Documentation written for OpenWRT Barrier Breaker 14.07 from fresh install.
Configuration from Web Interface (Luci)
1. Network | Wifi
 From the menu go to Network | Wifi.
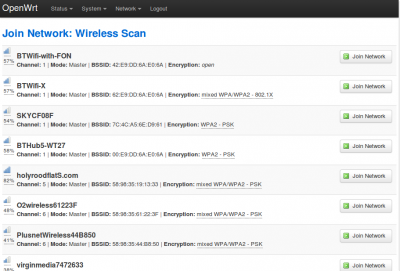
Then Hit The Scan button to find your hotspot network.
 Select your network with the Join Network button.
 Leave everything as default then hit Submit
 Hit Save & Apply on the next page.
 Return to Network | Wifi. Then hit the Add button to add the Access point interface.
 On this page enter the Essid that you would like to use (Using OpenWRT in this example). Make sure that LAN is ticked in the Network section. Then save it with Save & Apply.
 Now navigate to Network | DHCP & DNS. Untick Rebind protection then do Save & Apply.
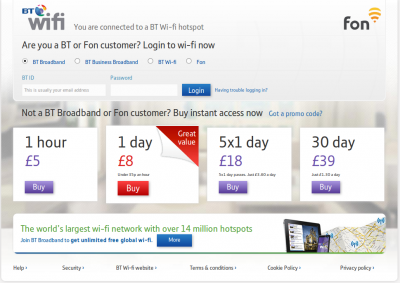
 Connect a wifi device to the network you just created. OpenWRT in our case here. Connect to any website then the hotspot login page will appear. Enter your credentials and any device connecting to the WR703N wifi will be connected.