RPICT7V1: Difference between revisions
No edit summary |
|||
| (14 intermediate revisions by the same user not shown) | |||
| Line 1: | Line 1: | ||
This product is deprecated. [[RPICT7V1_v2.0]] replaces it. | |||
[http://lechacalshop.com/en/internetofthing/8-raspberrypi-7x-current-sensor-adaptor-1-voltage-emoncms.html Link to shop] | |||
==Overview== | |||
This is RPICT7V1 version 1. This version does not support over serial configuration. | |||
This page is for board specific information. More information can be found on the [[Raspberrypi_Current_and_Temperature_Sensor_Adaptor | generic page for RPICT series]]. | |||
* 7 AC current sensor | * 7 AC current sensor | ||
* 1 AC Voltage sensor. | * 1 AC Voltage sensor. | ||
| Line 53: | Line 66: | ||
[http://lechacal.com/RPICT/7CT1V/SendOnlySoftwareSerial.zip SendOnlySoftwareSerial.zip] | [http://lechacal.com/RPICT/7CT1V/SendOnlySoftwareSerial.zip SendOnlySoftwareSerial.zip] | ||
==Sketch Upload== | |||
To upload the sketch the three jumper at the center of the board must be removed. | |||
An avr programmer with 6pin ribbon cable is needed for programming. | |||
[[RPICT7V1_v2.0 | Alternative version 2 here]] | |||
== | ==Related Links== | ||
[[How to calibrate the Voltage Port]] | |||
[[How_to_program_an_Attiny85_or_Attiny84]] | |||
[[ | [[Howto setup Raspbian for serial read]] | ||
Latest revision as of 19:17, 7 April 2019
This product is deprecated. RPICT7V1_v2.0 replaces it.
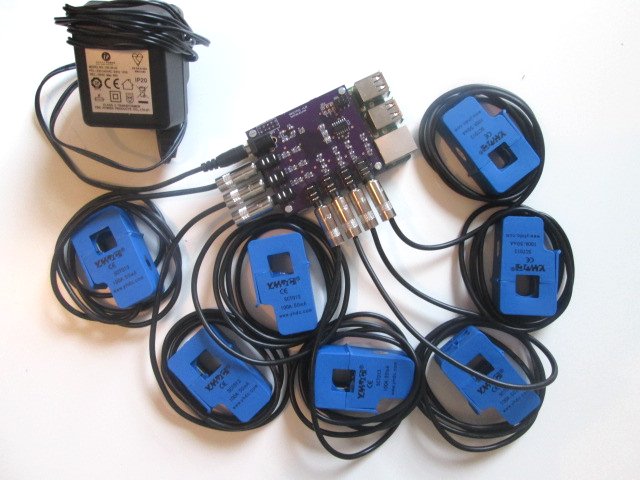
Overview
This is RPICT7V1 version 1. This version does not support over serial configuration.
This page is for board specific information. More information can be found on the generic page for RPICT series.
- 7 AC current sensor
- 1 AC Voltage sensor.
- Compute real power.
- Fit on Raspberrypi 4 holes mounting pattern.
- Attiny84 Mcu
Recommended sensors
- AC Current sensor: SCT-013-000
- AC Voltage sensor:
- UK: 77DB-06-09
- EU: 77DE-06-09
- US: 77DA-10-09
EmonCMS Output
Using the default sketch the output will be
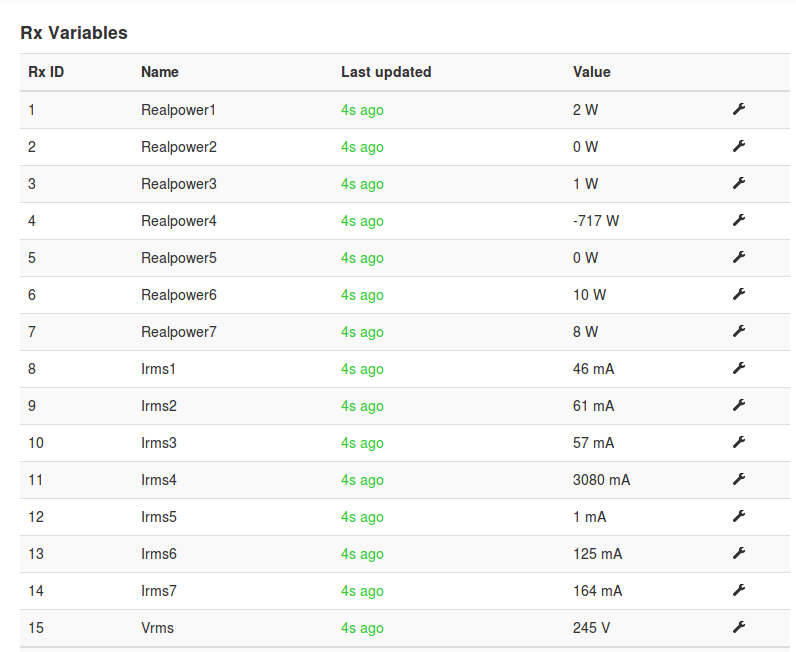
NodeID Realpower1 Realpower2 Realpower3 Realpower4 Realpower5 Realpower6 Realpower7 Irms1 Irms2 Irms3 Irms4 Irms5 Irms6 Irms7 Vrms
- RealPower in Watts
- Irms in MilliAmps
- Vrms in Volts
Emoncms Config
For default sketch v1.2
 [[11]]
   nodename = my_RPICT7V1
   firmware = v1.2
   hardware = RPICT7V1
   [[[rx]]]
      names = Realpower1, Realpower2, Realpower3, Realpower4, Realpower5, Realpower6, Realpower7,Irms1, Irms2, Irms3, Irms4,Irms5,Irms6,Irms7,Vrms
      datacode = h
      scales = 1,1,1,1,1,1,1,1,1,1,1,1,1,1,1
      units =W,W,W,W,W,W,W,mA,mA,mA,mA,mA,mA,mA,V
CSV Output
Using the default sketch the output will be
Realpower1, Realpower2, Realpower3, Realpower4, Realpower5, Realpower6, Realpower7,Irms1, Irms2, Irms3, Irms4, Irms5, Irms6, Irms7, Vrms
- RealPower in Watts
- Irms in MilliAmps
- Vrms in Volts
Files
Default Sketch V1.2.
SendOnlySoftwareSerial.zip
Sketch Upload
To upload the sketch the three jumper at the center of the board must be removed.
An avr programmer with 6pin ribbon cable is needed for programming.
Related Links
How to calibrate the Voltage Port


