First Use: Difference between revisions
Jump to navigation
Jump to search
(→3-) |
(→3-) |
||
| Line 17: | Line 17: | ||
==3-== | ==3-== | ||
* On the computer open a web browser (chrome/firefox/safari or else). | * On the computer open a web browser (chrome/firefox/safari or else). | ||
* Go to address [http://OpenWrt http://OpenWrt] (or [http://192.168.2.1 http://192.168.2.1]) | * Go to address [http://OpenWrt http://OpenWrt] (or alternatively [http://192.168.2.1 http://192.168.2.1]) | ||
* The Luci web interface should now appear. | * The Luci web interface should now appear. | ||
* Login using user '''root''' password '''admin'''. | * Login using user '''root''' password '''admin'''. | ||
Revision as of 12:44, 23 June 2018
First time setup is really straight forward.
Acccessing the web interface
1-
- Insert the SKW71 module on the base unit. Manipulate gently as these are small parts.
- Power on the unit with a micro USB cable.
2a- Using wifi
- Using a wifi enabled computer connect to network Emonwrt3.
2b- Using Wired Ethernet
- Connect a network cable from the base unit directly to a computer.
- Connect the micro USB power cable.
3-
- On the computer open a web browser (chrome/firefox/safari or else).
- Go to address http://OpenWrt (or alternatively http://192.168.2.1)
- The Luci web interface should now appear.
- Login using user root password admin.
Visualise Data

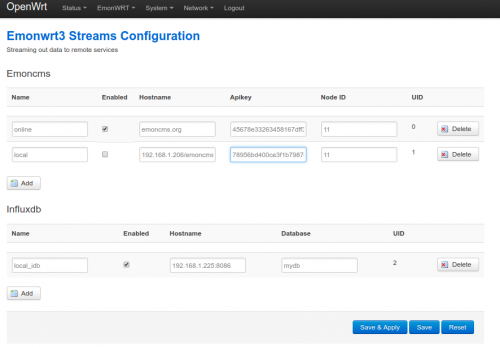
- From the top menu select Emonwrt3 | Streams
- The first Emoncms entry will be enabled but not configured.
- Get the Read & Write apikey from your emoncms online account.
- Copy and paste it in the apikey field of the first stream entry on Luci.
- Save and apply. After few seconds data will appear on the Emoncms online account under Setup | Inputs.