Standalone Arduino Programmer: Difference between revisions
Jump to navigation
Jump to search
No edit summary |
No edit summary |
||
| Line 9: | Line 9: | ||
=Features= | =Features= | ||
* Onboard Micro SD card | * Onboard Micro SD card. | ||
* 3 operation LED (work / ok / error) | * 3 operation LED (work / ok / error). | ||
* 3 operation button | * 3 operation button. | ||
* 6 pin SPI connection to target | * 6 pin SPI connection to target. | ||
* Additional GPIO pins available for expansion. | * Additional GPIO pins available for expansion. | ||
* Provision for use of a small LCD screen. | * Provision for use of a small LCD screen. | ||
=Basic Usage= | |||
==Preparing the programmer== | |||
* Compile the target sketch on Arduino IDE. | |||
* Locate the produced hex file. | |||
* Copy it to the SD card. | |||
* Rename the file as 'firmware'hex'. | |||
* Insert the SD card in the programmer. | |||
==Production Usage== | |||
* Connect the 6 pin ribbon cable to the target device. | |||
* Press the OK button. | |||
* Sucessful flash will be indicated with the green led 'ok' | |||
Revision as of 21:07, 13 September 2023
Overview
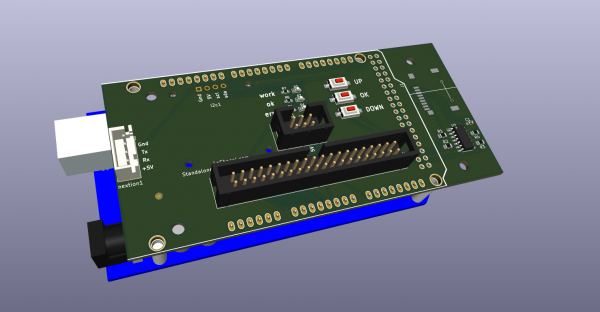
The standalone Arduino Programmer can programme many atmel chip in stand alone mode which means it does not need a computer to operate. This is very useful for automating the programming of large number of chips.
Features
- Onboard Micro SD card.
- 3 operation LED (work / ok / error).
- 3 operation button.
- 6 pin SPI connection to target.
- Additional GPIO pins available for expansion.
- Provision for use of a small LCD screen.
Basic Usage
Preparing the programmer
- Compile the target sketch on Arduino IDE.
- Locate the produced hex file.
- Copy it to the SD card.
- Rename the file as 'firmware'hex'.
- Insert the SD card in the programmer.
Production Usage
- Connect the 6 pin ribbon cable to the target device.
- Press the OK button.
- Sucessful flash will be indicated with the green led 'ok'
