Standalone Arduino Programmer: Difference between revisions
Jump to navigation
Jump to search
No edit summary |
No edit summary |
||
| Line 28: | Line 28: | ||
* Press the OK button. | * Press the OK button. | ||
* Sucessful flash will be indicated with the green led 'ok' | * Sucessful flash will be indicated with the green led 'ok' | ||
=Firmware= | |||
Several firmwares that can be used on the programmer. | |||
==Factory firmware== | |||
The default firmware allow programming with the buttons and confirmation is indicated with leds. | |||
The firmware can be downloaded from this github repo below. | |||
https://github.com/nickgammon/arduino_sketches | |||
Choose sketch named '''Atmega_Hex_Uploader_Fixed_Filename''' | |||
Revision as of 21:13, 13 September 2023
Overview
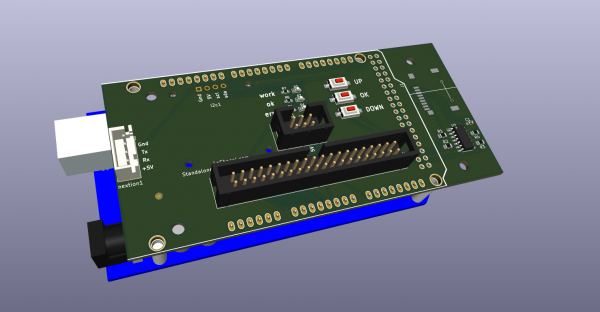
The standalone Arduino Programmer can programme many atmel chip in stand alone mode which means it does not need a computer to operate. This is very useful for automating the programming of large number of chips.
Features
- Onboard Micro SD card.
- 3 operation LED (work / ok / error).
- 3 operation button.
- 6 pin SPI connection to target.
- Additional GPIO pins available for expansion.
- Provision for use of a small LCD screen.
Basic Usage
Preparing the programmer
- Compile the target sketch on Arduino IDE.
- Locate the produced hex file.
- Copy it to the SD card.
- Rename the file as 'firmware'hex'.
- Insert the SD card in the programmer.
Production Usage
- Connect the 6 pin ribbon cable to the target device.
- Press the OK button.
- Sucessful flash will be indicated with the green led 'ok'
Firmware
Several firmwares that can be used on the programmer.
Factory firmware
The default firmware allow programming with the buttons and confirmation is indicated with leds. The firmware can be downloaded from this github repo below. https://github.com/nickgammon/arduino_sketches
Choose sketch named Atmega_Hex_Uploader_Fixed_Filename
