Transform a RPICT into a web scope: Difference between revisions
| Line 41: | Line 41: | ||
Make sure the previous command is successful before entering the following one. | Make sure the previous command is successful before entering the following one. | ||
sudo cp /tmp/lighttpd.conf /etc/lighttpd/lighttpd.conf | sudo cp /tmp/lighttpd.conf /etc/lighttpd/lighttpd.conf | ||
Now navigate to the http public folder and install the scope webserver. | Now navigate to the http public folder and install the scope webserver. | ||
| Line 48: | Line 48: | ||
sudo wget lechacal.com/RPICT/scope/rpict-scope-v1.0.zip | sudo wget lechacal.com/RPICT/scope/rpict-scope-v1.0.zip | ||
sudo unzip rpict-scope-v1.0.zip | sudo unzip rpict-scope-v1.0.zip | ||
This will create a folder called ''scope''. There is a configuration file inside called ''rpict-scope.conf'' which should not need to be modified. | |||
At time of writing lighttpd need a small fix. The 2 commands below are for this. | At time of writing lighttpd need a small fix. The 2 commands below are for this. | ||
| Line 53: | Line 55: | ||
sudo ln -s create-mime.conf.pl create-mime.assign.pl | sudo ln -s create-mime.conf.pl create-mime.assign.pl | ||
Restart the service using | |||
sudo /etc/init.d/lighttpd restart | |||
=Run the service and view the data= | =Run the service and view the data= | ||
Revision as of 16:23, 28 April 2021
THIS GUIDE IS INCOMPLETE. COMING SOON...
Overview
This is to show the waveform on a web browser using the RPICT in a special configuration. We will use the Raspberrypi to collect the analogue data from the RPICT and serve them as a HTTP server.
IMPORTANT. This is not a substitute for a scope. This is just a playground for demonstration.
Preliminaries
Make sure you have a fresh Raspbian image installed.
Setup the Raspbian to enable the serial port. See the guide below to complete this.
Howto setup Raspbian for serial read
Upload the Sketch
The RPICT will require a different sketch. Download the appropriate sketch that applies.
RPICT4T4 RPICT3V1
RPICT Scope Attiny Version 1.0
RPICT3T1
Not ready yet.
RPICT7V1 RPICT4V3 RPICT8
RPICT Scope Mcp3208 Version 1.0
RPICT Scope Mcp3208 Version 1.1
Setup the web server
Install lighthttp to configure the Raspberrypi as a web server.
sudo apt-get install lighttpd
sudo wget lechacal.com/repo/emonwrt3/lighttpd.conf -O /tmp/lighttpd.conf
Make sure the previous command is successful before entering the following one.
sudo cp /tmp/lighttpd.conf /etc/lighttpd/lighttpd.conf
Now navigate to the http public folder and install the scope webserver.
cd /var/www/html/
sudo wget lechacal.com/RPICT/scope/rpict-scope-v1.0.zip
sudo unzip rpict-scope-v1.0.zip
This will create a folder called scope. There is a configuration file inside called rpict-scope.conf which should not need to be modified.
At time of writing lighttpd need a small fix. The 2 commands below are for this.
cd /usr/share/lighttpd
sudo ln -s create-mime.conf.pl create-mime.assign.pl
Restart the service using
sudo /etc/init.d/lighttpd restart
Run the service and view the data
From the raspberrypi run the following command.
/var/www/html/scope/lcl-rpict-scope.py
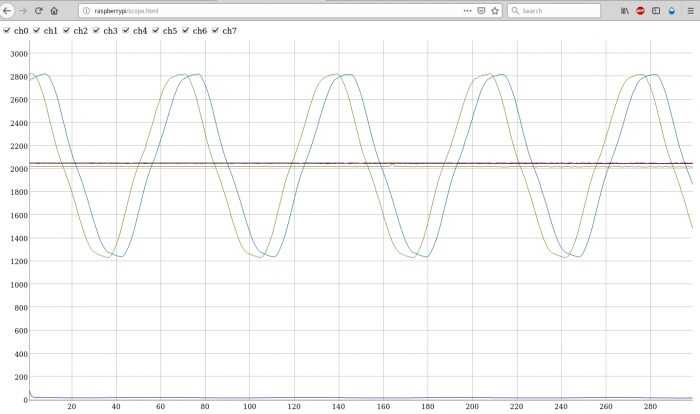
Then now open a web browser and go to address
http://raspberrypi/scope/scope.html?yrange=4100
Modify yrange in the address as required.
