RPI T8

This page is for board specific information. More information can be found on the generic page for RPICT series.
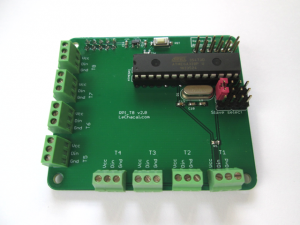
- 8 Temperature ports for DS18B20
- Fit on Raspberrypi 4 holes mounting pattern.
- AtMega328 Mcu (Arduino UNO)
- Stackable
Compatibility
| Version | Compatible? |
|---|---|
| Raspberrypi 1 A | No |
| Raspberrypi 1 B+ | Yes |
| Raspberrypi 2 B | Yes |
| Raspberrypi 3 B | Yes |
| Raspberrypi 3 B+ | Yes. |
| Raspberrypi 4 B | Yes. |
- Asus Tinkerboard has been reported to work with RPICT units. Note we wont be able to provide support for the Tinkerboard.
Recommended sensors
- DS18B20
The RPI_T8 has 8 ports readily available for connection with a DS18B20. Note that more than 8 probes can be used by connecting several probe to a single port.
Stacking Information

The RPI_T8 can be used on its own or stacked on top of RPICT7V1 RPICT4V3 or RPICT8.
The RPI_T8 must be slave number 1. i.e. First jumper set as slave. Microcontroller must be removed from the board to operate as slave.
RPI_T8 must be the top unit in any stack. This is due to the screw terminal which won't be accessible if not at the top.
General stacking information is described in the RPICT stacking page.
RPICT_Stacking
RPICT_Stacking_Version_5
Limitations. The default sketch normally allows up to 28 Current/Voltage pairs to be executed. This is lowered to 16 when using the RPI_T8 in the stack.
Software Configuration
As Master
The RPI_T8 uses the same configuration structure as other master hardware. However only nodeid and polling have any effect.
Over Serial Configuration - Sketch 3.0
The data output as master has the following format:
nodeid T1 T2 T3 T4 ...
Note the order of the temperature probe appearing does not depend on which port they are connected but on the address of the DS18B20 probe.
The know the address of the probe use the cat command to output the data stream and perform a reset of the board. At boot up all addresses of found probes will appear.
As Slave
The documentation for serial configuration can be found on this page.
Over_Serial_Configuration_-_Sketch_4
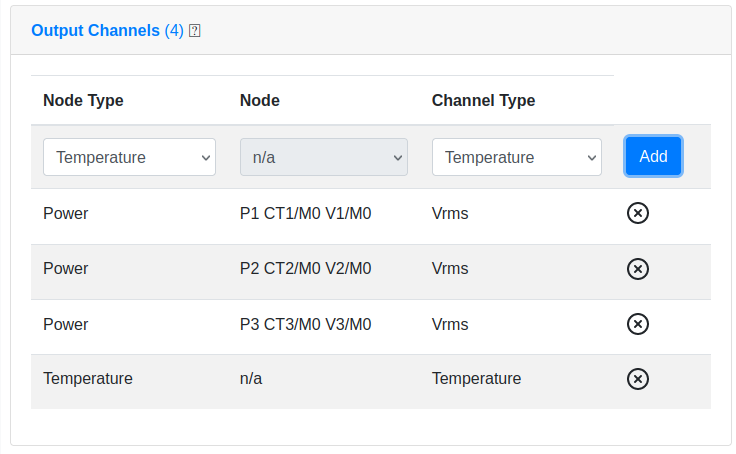
To enable temperature just add a single channel as temperature. All detected probe will be sent on output one after the other.
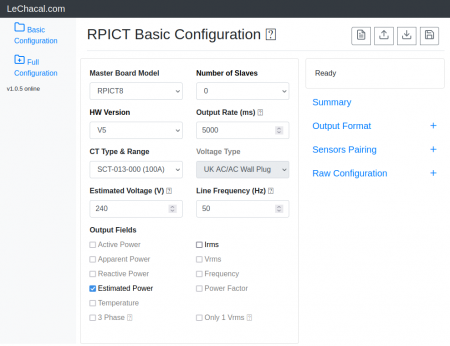
The board can be configured with the online configurator.
There are two ways to include the temperature salve board in the config
Manually
Add the temperature channel manually in the config file by adding 255 255 7 like shown below.
In Full Configuration page
Load your current configuration in the 'Full Configuration' page.
Do not count the RPI_T8 slave in the slave count. For example if having one master and one RPI_T8 just leave the number of slaves as 0.
Add the temperature channel in the 'output channel' section like below.
Files
Sketch
Master Sketch
Slave Sketch
In order to use the RPI_T8 as slave the master board must be flashed with the sketch below. These have temperature support enabled.
Default RPICT_MCP3208_v4.1.0_TEMP06 for RPI_T8 as Slave 1.
Default RPICT_MCP3208_v4.1.0_TEMP07 for RPI_T8 as Slave 2.


